Making your Own Software Repository with Github and Github Pages
Making your own software Repository for Arch Linux
Goal is to make our own software Repository for Arch Linux, Host it on Cloud and use it in our machine. The repository will be hosted through GitHub Pages for FREE
In this article, we will create our own repository called calinix_repo.
Getting ready with folder structure
First, set up your workspace. First we create a folder in our pc.
mkdir calinix_repo
Then we create a subfolder in it called x86_64
cd calinix_repo

mkdir x86_64
Now in this x86_64 directory, add your packages. How to do that?
Getting a Package for the Repository
In Arch Linux, the packages you provide are in a tar.zst format. This section will show you how to obtain the tar.zst of a package
For AUR Packages
First, go to the AUR page of the package. Suppose I wanna build the PKGBUILD for yay-git, so I go to https://aur.archlinux.org/packages/yay-git/
Now on the right side, you see an option called 'Download Snapshot'
Click on it, it will download the snapshot of the package. Then move to the place where you downloaded the snapshot. Extract the snapshot and cd into the folder
Now run makepkg to build the package. When the building finishes, a tar.zst file will be present in same directory. Paste that in the x86_64 folder of the repository.
For local packages
If you have made a PKGBUILD, just run `makepkg` in the directory to generate a tar.zst of your package
Building the Repo DB
Now after you've added all the tar.zst files in the x86_64 folder, you have to build a db out of it. To do it, we can use the traditional command, but no, we will use the smart way here.
Get our repository building script at https://github.com/Calinix-Team/calinix_repo/blob/master/x86_64/update_repo.sh and place it in the x86_64 repo
Make the necessary changes to it, for example, change all the calinix to your repo name. In our case, the file contents will be:
rm calinix_repo.db calinix_repo.files

echo "repo-add"

repo-add -s -n -R calinix_repo.db.tar.gz *.pkg.tar.zst

sleep 1

rm calinix_repo.db

rm calinix_repo.db.sig

rm calinix_repo.files

rm calinix_repo.files.sig

mv calinix_repo.db.tar.gz calinix_repo.db

mv calinix_repo.db.tar.gz.sig calinix_repo.db.sig

mv calinix_repo.files.tar.gz calinix_repo.files

mv calinix_repo.files.tar.gz.sig calinix_repo.files.sig

echo "####################################"

echo "Repo Updated!!"

echo "####################################"
This Builds the repos and creates the file calinix_repo.db
Deploying the repo
We are now done with our repository. The update script has to be ran everytime you edit a tar.zst or add a new one.
Now we need to create a github repository with the same name you used for the db file
So we go to github.com and create a new repository calinix_repo
In this case let's suppose our github repository is at github.com/calinix/calinix_repo
So we again move to the terminal and in the folder of our repository (not x86_64)
git init

git remote add origin https://github.com/calinix/calinix_repo/

git add .

git commit -m "Your commit message"

git push origin branchname # usually main/master
This will update your GitHub Repository. Now go to settings of your Repository and add Pages integration to it.
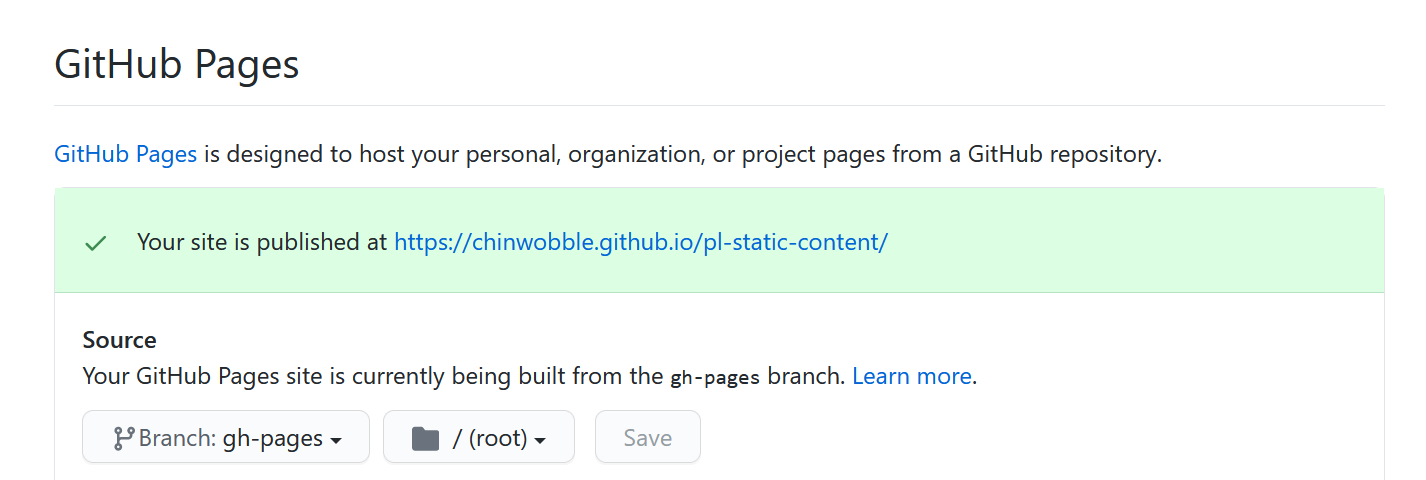
Change the branch to root as shown above. Now Proceed. Wait for 5 minutes and reload the page until it shows that your site is published.
So our Repository will be published in calinix.github.io/calinix_repo
Yours will be different according to your username/organisation name and Repository name.
Adding the repository in pacman.conf
Now we need to add the following lines in our /etc/pacman.conf
[calinix_repo]

SigLevel = Optional TrustedOnly

Server = https://calinix.github.io/$repo/$arch
Remember the [reponame] should be exactly what your db file name and Repository name is.
Now run pacman -Sy to sync your repositories and done!
We have created, hosted and synced our own repository successfully! Congo!


Comments
Post a Comment